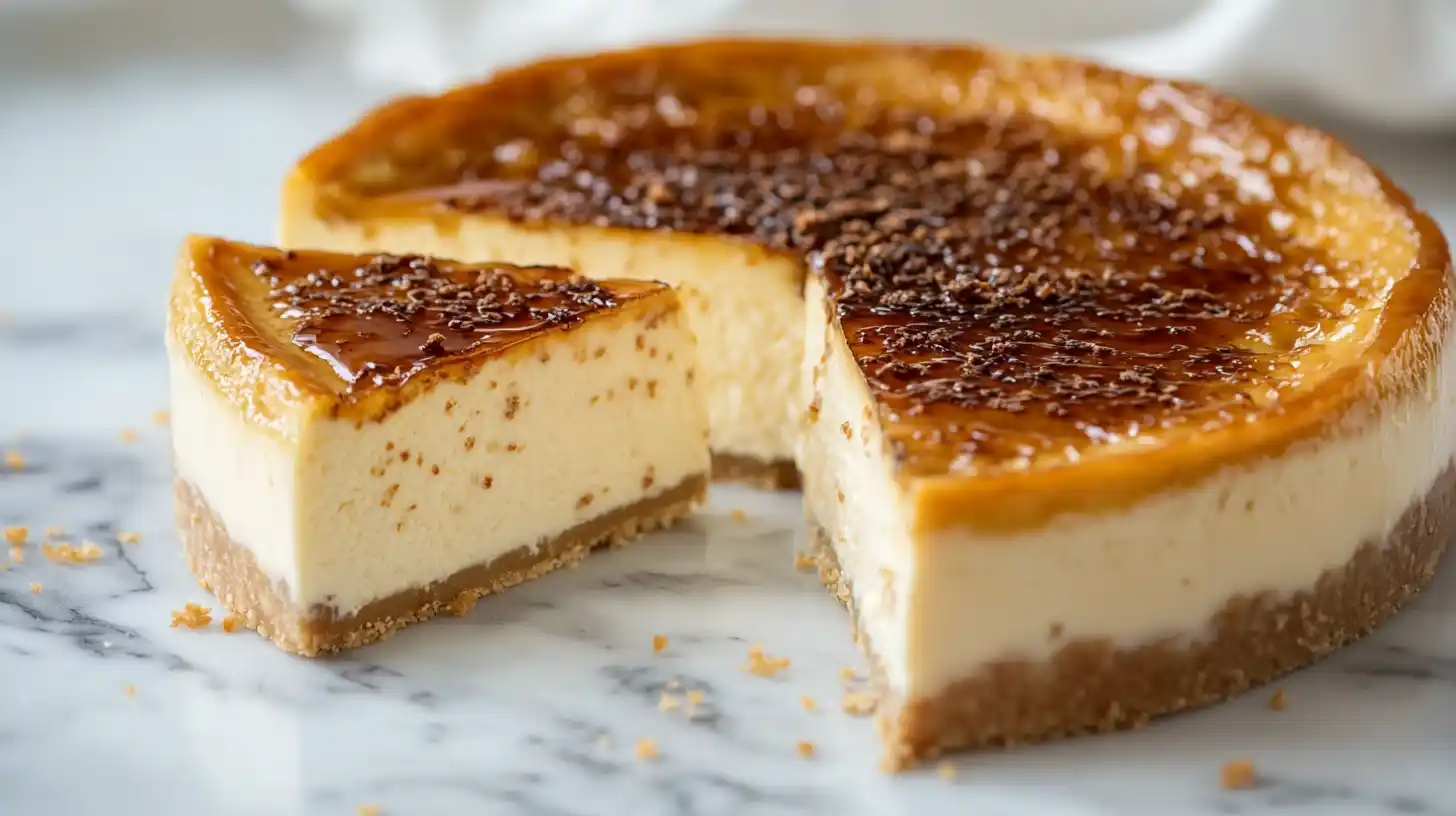
Love cheesecake? Crazy about crème brûlée? This dessert brings the best of both worlds into one decadent masterpiece. With a silky, creamy filling and a crackly caramelized sugar topping, crème brûlée cheesecake is the perfect mix of elegance and indulgence and the best part? It’s easier to make than it looks!
Table of contents
- What is Crème Brûlée Cheesecake Recipe?
- Key Ingredients for a Perfect Crème Brûlée Cheesecake Recipe
- Step-by-Step Recipe for Crème Brûlée Cheesecake Recipe
- How to Caramelize the Sugar Topping Like a Pro
- Tips to Avoid Common Mistakes
- Storing and Freezing Crème Brûlée Cheesecake Recipe
- What to Serve with Crème Brûlée Cheesecake
- Frequently Asked Questions
- Final Thoughts
What is Crème Brûlée Cheesecake Recipe?
Can’t decide between creamy cheesecake and fancy crème brûlée? Crème brûlée cheesecake is the perfect mash-up of both a true dessert power couple.
It all begins with a classic cheesecake base cream cheese, sugar, eggs, and a buttery crust. Then comes the twist: a delicate layer of sugar on top, torched to a golden, glassy finish. The first bite delivers that signature crack, giving way to smooth, velvety cheesecake. This isn’t just dessert it’s an experience.
Why This Dessert Is Gaining Popularity
Cheesecake is loved. Crème brûlée is iconic. Combine them, and you get a dessert that everyone instantly falls for.
It’s not just the rich, creamy texture or the caramelized sugar topping—it’s the whole experience. That crisp sugar crack, followed by a smooth, melt-in-your-mouth bite? Pure satisfaction.
And let’s not forget the look. Crème brûlée cheesecake has a fancy, elegant vibe that makes it perfect for dinner parties, holidays, or any time you want to wow a crowd.
Key Ingredients for a Perfect Crème Brûlée Cheesecake Recipe
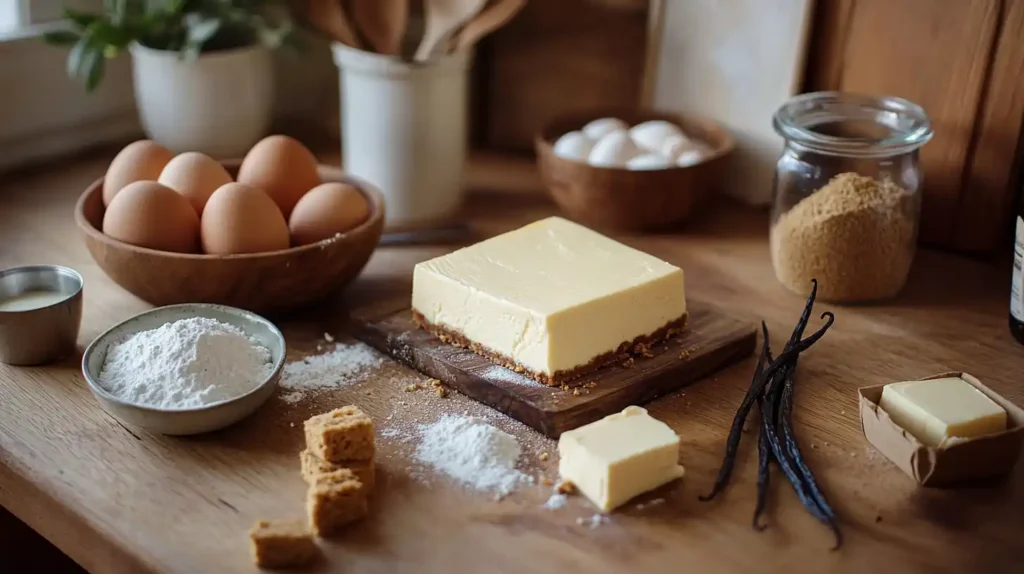
Alright, let’s talk ingredients. If you want your crème brûlée cheesecake to taste bakery-worthy (or better), it all comes down to quality. No shortcuts, no odd swaps just simple, top-notch ingredients that make every bite unforgettable.
Here’s everything you need to make this masterpiece come to life:
Ingredients and Quantities (Full Recipe Table)
| Ingredient | Quantity | Use |
|---|---|---|
| Graham cracker crumbs | 1 ½ cups (180g) | For the crust |
| Brown sugar | ¼ cup (55g) | Mixed with crumbs for crust |
| Unsalted butter (melted) | 6 tbsp (85g) | Binds the crust |
| Cream cheese (softened) | 4 blocks (907g total) | Base of the cheesecake |
| Granulated sugar | 1 ⅓ cups (266g) | Sweetener for filling |
| Vanilla bean pods | 2 pods (or paste) | Real flavor boost |
| Sour cream | ½ cup (120g) | Adds tang and creaminess |
| Large eggs (room temp) | 4 | Binds everything together |
| Vanilla extract | ½ tbsp | Flavor enhancement |
| Salt | ½ tsp | Balances the sweetness |
| Extra granulated sugar | ¼ cup (50g) | For the brûlée topping |
Optional (But Awesome) Add-Ins
Want to level up your cheesecake game? Here are a few things you could experiment with:
- Citrus Zest: Lemon or orange zest in the batter can brighten the flavor.
- Boozy Flavors: A splash of bourbon or rum adds a grown-up twist.
- Spices: A dash of cinnamon in the crust or a hint of nutmeg in the filling? Chef’s kiss.
Can I Use Store-Bought Crust or Low-Fat Cream Cheese?
Sure, you can. But should you? That’s up for debate.
Store-bought crusts are convenient, but they often fall apart or taste bland. And low-fat cream cheese? It just doesn’t have the same richness. If you want that creamy-dreamy texture and full-on flavor explosion, go with full-fat ingredients and make your own crust. You’re already committing to baking a cheesecake might as well do it right.
Step-by-Step Recipe for Crème Brûlée Cheesecake Recipe
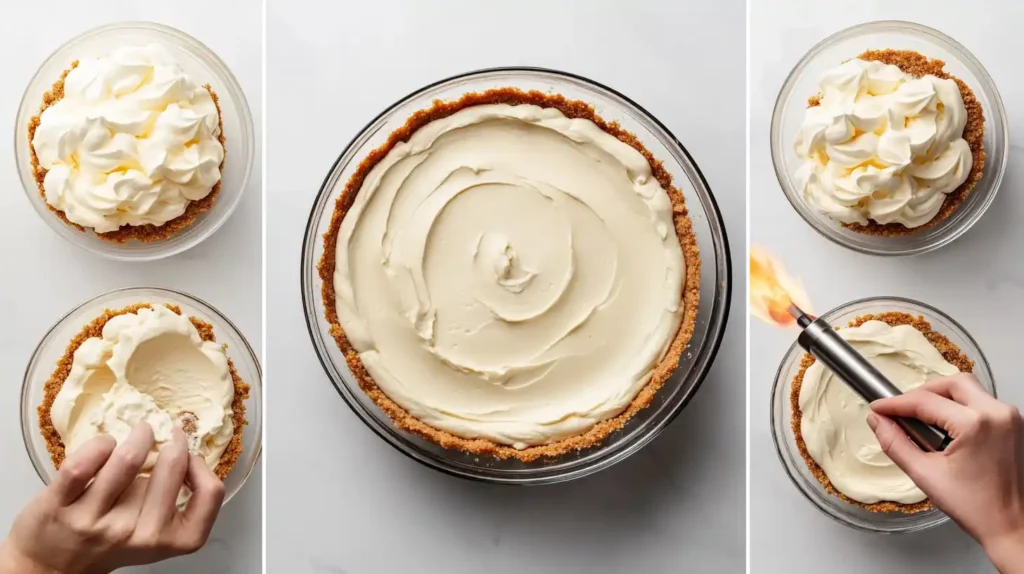
Alright, so we’ve talked about what this dreamy dessert is and everything you’ll need to make it. Now it’s time to actually bake this beauty! Don’t worry if you can follow a recipe and have a little patience, you’ve got this.
We’re breaking the process into five simple stages:
- Make the crust
- Whip up the filling
- Bake in a water bath
- Chill it to perfection
- Brûlée the top
Let’s roll.
Step 1: Make the Buttery Graham Cracker Crust
What you’ll need:
- 1 ½ cups graham cracker crumbs
- ¼ cup brown sugar
- 6 tbsp melted unsalted butter
Instructions:
- Preheat your oven to 325°F (165°C).
- In a bowl, combine graham cracker crumbs and brown sugar.
- Pour in the melted butter and mix until everything looks like wet sand.
- Press the mixture firmly into the bottom of an 8-inch or 9-inch springform pan. Use a flat-bottomed glass or measuring cup to pack it down evenly.
- Bake the crust for 10 minutes. Then remove it and let it cool while you prep the filling.
Pro Tip: If you’re using an 8″ pan, make sure it has tall sides at least 3 inches. This cheesecake rises and needs space!
Step 2: Make the Creamy Cheesecake Filling
What you’ll need:
- 4 blocks (907g) cream cheese, softened
- 1 ⅓ cups granulated sugar
- 2 vanilla bean pods (or 1 tbsp vanilla bean paste)
- ½ cup sour cream
- 4 large eggs, room temperature
- ½ tbsp vanilla extract
- ½ tsp salt
Instructions:
- In a large bowl, beat the cream cheese on medium speed until it’s super smooth. Scrape down the sides often this helps avoid lumps.
- Add in the granulated sugar. Slice open the vanilla bean pods and scrape the seeds into the mix (or just add the paste if using that).
- Beat everything together until creamy and fluffy.
- Mix in the sour cream, and again, scrape that bowl!
- Now, one egg at a time gently mix until each one is just combined before adding the next. Don’t rush, but don’t overbeat either.
- Add vanilla extract and salt. Mix until everything is smooth and silky.
Texture Tip: If your batter is lumpy, your ingredients probably weren’t at room temp. Cold ingredients = clumps. Warm and relaxed ingredients = creamy perfection.
Step 3: Bake It in a Water Bath
Why a water bath? It helps the cheesecake bake evenly and prevents cracking. Basically, it’s like giving your cheesecake a relaxing spa day.
Here’s how to do it:
- Wrap the outside of your springform pan in 3–4 layers of heavy-duty aluminum foil. You want it fully sealed so water can’t sneak in.
- Place your foil-wrapped pan into a deep roasting pan.
- Pour the cheesecake filling over the cooled crust and smooth out the top with a spatula.
- Carefully pour hot water into the roasting pan enough to come about halfway up the sides of the cheesecake pan.
- Bake at 325°F (165°C) for 60–75 minutes.
How do you know it’s done? Give the pan a gentle jiggle. The center should still have a little wobble, but the edges should look set. Don’t wait for it to look completely firm—overbaking = dry cheesecake.
Step 4: Cool & Chill (Yes, This Takes Time)
- When it’s done baking, turn off the oven, but don’t open the door. Let the cheesecake sit in the oven for 1 full hour. This slow cooling prevents cracks.
- After that, remove it from the oven and let it cool at room temperature for another 30 minutes to 1 hour.
- Cover it and refrigerate for at least 6 hours, but ideally overnight.
Tip: Don’t remove the springform ring until the cheesecake is fully chilled and set.
How to Caramelize the Sugar Topping Like a Pro
Now we get to the fun part: the brûlée.
If you’ve never used a kitchen torch before, don’t worry it’s way easier than it looks. Plus, it makes you feel like a legit pastry chef. And if you don’t have one? I’ve got an oven broiler trick too.
What You’ll Need:
- ¼ cup granulated sugar
- Kitchen torch (preferred)
- Optional: superfine sugar for a smoother finish
Option 1: Using a Kitchen Torch (The Fancy Way)
- Remove your cheesecake from the fridge and take off the springform pan ring.
- Pat the top of the cheesecake gently with a paper towel to remove any moisture.
- Sprinkle a thin, even layer of sugar all over the top.
- Light your torch and move it in slow, circular motions, just above the surface of the sugar.
- Keep it moving don’t stay in one spot too long or it’ll burn.
- When the sugar melts and turns golden and bubbly, you’re done!
Let it cool for 2–3 minutes. The sugar will harden into that signature crackly top.
Option 2: Using Your Oven’s Broiler (The Backup Plan)
No torch? No problem.
- Set your oven’s broiler to high.
- Sprinkle the sugar evenly over the cheesecake top.
- Place the cheesecake on the top oven rack (as close to the broiler as possible).
- Watch it like a hawk. The sugar will melt and bubble within 1–3 minutes.
Important: The oven method can make the cheesecake warm again, so chill it for 20–30 minutes afterward to firm it back up.
Pro Tips for the Best Brûlée
- Use even sugar layers: Too thick, and it won’t melt properly. Too thin, and it burns fast.
- Don’t brûlée too early: Only torch the sugar layer right before serving for the best crunch.
- Re-torching leftovers: Yes, you can! The top softens in the fridge, but a light re-toast brings the crunch back (though not as perfect as the first time).
Tips to Avoid Common Mistakes
Let’s be real: cheesecake is one of those desserts that looks easy until you try it. And crème brûlée cheesecake? That’s leveling up. But don’t stress if you know what not to do, you’re already halfway to success.
Here are some super practical tips to help you nail your cheesecake game, first time and every time after.
Lumpy Batter
What’s going wrong?
Cold ingredients. That’s it. Cream cheese straight from the fridge is thick and stiff, and it doesn’t blend smoothly with sugar and eggs. You’ll end up with chunks no matter how hard you mix.
Fix it:
Let all your dairy especially cream cheese, sour cream, and eggs come to room temperature before mixing. Give them about 30 minutes out on the counter. This one step makes your batter luxuriously smooth and totally lump-free.
Cracks on the Top
Ah yes, the dreaded cheesecake crack. It doesn’t mean your dessert is ruined (it still tastes amazing!), but if you’re aiming for picture-perfect, it’s a letdown.
Why it happens:
- Overmixing the batter (too much air)
- Sudden temperature changes (like pulling it out of the oven too soon)
- Skipping the water bath
Fix it:
- Don’t overmix. After adding eggs, mix just until combined. No need to beat the life out of it.
- Use a water bath. It keeps the temperature even and prevents the edges from baking too fast.
- Let it cool gradually. Leave the cheesecake in the oven (turned off) for an hour after baking. No peeking!
Overbaking
A perfect cheesecake should be creamy and a little jiggly in the middle not dry and rubbery.
How do you know it’s done?
Do the “jiggle test.” Gently shake the pan. If the outer edge is set but the center wobbles like Jell-O, it’s ready. It’ll firm up as it chills in the fridge.
Pro Tip:
Don’t go by the color alone browning means overbaking. Cheesecake should look pale and soft, not golden brown like a cake.
Soggy Crust
You did everything right, but your crust came out soggy. That’s a big letdown, right?
Why it happens:
Water leaked into the pan during the water bath.
Fix it:
Wrap your springform pan in three to four layers of wide, heavy-duty aluminum foil. No shortcuts. Make sure there are no holes or gaps. If you’re extra cautious, place the pan inside a larger oven-safe bag (like a turkey roasting bag) before the foil.
Uneven Brûlée Top
Caramelizing sugar seems easy, but uneven browning or burnt patches can happen fast.
Fix it:
- Use granulated or superfine sugar and sprinkle a thin, even layer.
- Move your kitchen torch in slow circles don’t hold it in one spot.
- Torch just before serving so the top stays crisp.
Storing and Freezing Crème Brûlée Cheesecake Recipe
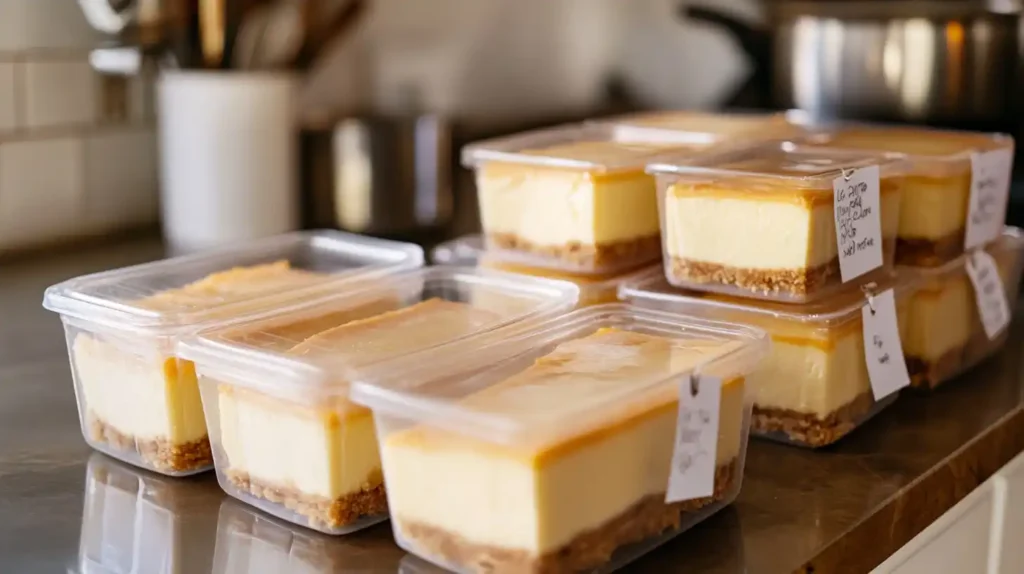
So you’ve baked it, brûléed it, and maybe eaten half of it in one sitting (hey, no judgment). But what about the leftovers? Can you save them without ruining that delicate sugar top or the creamy filling? Absolutely if you do it right.
Let’s break it down.
How to Store Crème Brûlée Cheesecake in the Fridge
Your cheesecake is best when chilled, so storing it in the refrigerator is a no-brainer.
- Wrap it tightly in plastic wrap or place it in an airtight container to prevent it from drying out or absorbing other fridge smells (looking at you, onion leftovers).
- Keep it on a flat surface so the brûlée top doesn’t crack or cave in.
- It’ll stay fresh for 4 to 5 days in the fridge.
Note: The caramelized sugar topping will lose its crunch within a few hours of refrigeration. It becomes soft and syrupy but still tasty!
How to Re-Torch the Sugar Topping
If that sugar top has gone soft, you can actually bring it back!
- Use a kitchen torch on low heat to re-caramelize the sugar just before serving.
- Add a fresh sprinkle of sugar if needed for extra crunch.
Will it be as perfect as the first torch? Maybe not. But will it still be delicious? You bet.
Can You Freeze Crème Brûlée Cheesecake recipe?
Totally. But here’s the trick: don’t torch the sugar topping until after thawing. The brûlée layer does not freeze well it gets sticky and weird.
How to freeze:
- Let the cheesecake cool completely in the fridge overnight.
- Wrap it tightly in plastic wrap, then in aluminum foil for double protection.
- Place it in a freezer-safe container or ziplock bag.
- Freeze for up to 2 months.
When you’re ready to eat it:
- Thaw in the fridge for at least 8 hours.
- Once fully thawed, brûlée the top like you normally would.
What to Serve with Crème Brûlée Cheesecake
- Strawberries and Cream: Classic pairing with a luxurious touch.
- Vanilla Cheesecake Recipe: Light and creamy for a cheesecake duo.
- Cottage Cheese Desserts: A healthy, creamy contrast.
- Mandarin Orange Cake Recipe: Bright and juicy complement.
Frequently Asked Questions
What is the difference between crème brûlée and cheesecake?
Great question! Cheesecake is a thick, creamy dessert made with cream cheese, eggs, and sugar, usually baked with a cookie crust. Crème brûlée is a silky, egg-based custard topped with caramelized sugar. The main differences are the texture (custard vs. dense) and structure (brûlée has no crust, cheesecake does).
When you combine them in crème brûlée cheesecake, you get the creaminess of cheesecake with the crispy caramel top of crème brûlée. Best of both worlds!
Can you make crème brûlée cheesecake ahead of time?
Absolutely and in fact, you should. Cheesecake needs time to set and chill in the fridge. It’s actually best made 1 day in advance. Just don’t brûlée the top until you’re ready to serve.
Want to plan even further ahead? You can bake and freeze the cheesecake without the brûlée topping up to two months in advance.
How do you get the top of crème brûlée cheesecake recipe crispy?
Two words: kitchen torch.
After the cheesecake has chilled completely, pat the top dry with a paper towel. Then sprinkle an even layer of sugar (about 1–2 teaspoons per slice or ¼ cup total) and torch it in slow, circular motions.
If you don’t have a torch, you can use the broiler, but be super careful and watch it closely!
Why does my cheesecake crack after baking?
Cracks usually happen from:
- Overmixing the batter (too much air)
- Sudden temperature changes
- Overbaking
- Skipping the water bath
To avoid cracks, follow our earlier tips: don’t overmix, use a water bath, let it cool slowly, and always chill fully before slicing.
And hey, if it does crack? Just brûlée the top and call it rustic. Problem solved.
Final Thoughts
Crème brûlée cheesecake isn’t just a dessert it’s a moment. From that first satisfying crack of caramelized sugar to the last creamy bite, this recipe is a showstopper every time. Whether you’re baking it for a special celebration or just because you deserve something amazing, this cheesecake is guaranteed to impress.
So grab your torch, gather your ingredients, and let your inner pastry chef shine. You’ve got this and your taste buds will thank you.
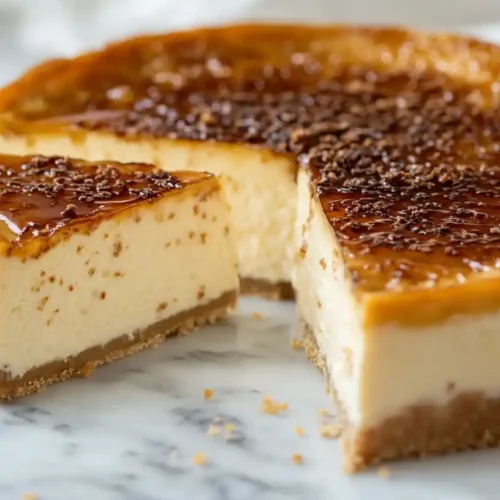
Crème Brûlée Cheesecake
Equipment
- Springform Pan
- Mixing bowls
- Electric Mixer
- Baking Sheet
- Aluminum Foil
- Roasting Pan
- Kitchen Torch
Ingredients
Graham Cracker Crust
- 1 ½ cups graham cracker crumbs
- ¼ cup brown sugar
- 6 tbsp unsalted butter melted
Cheesecake Filling
- 4 blocks cream cheese softened
- 1 ⅓ cups granulated sugar
- 2 pods vanilla bean seeds scraped (or 2 tsp vanilla bean paste)
- ½ cup sour cream
- 4 large eggs room temperature
Crème Brûlée Topping
- ¼ cup granulated sugar for topping
Instructions
- Preheat oven to 325°F (163°C). Line a springform pan with parchment paper and grease the sides. Wrap bottom with aluminum foil and place on a baking sheet.
- Mix graham cracker crumbs, brown sugar, and melted butter. Press into the bottom of the pan and bake for 10 minutes. Let cool.
- In a large bowl, beat cream cheese and sugar until smooth. Add vanilla, sour cream, and eggs one at a time. Mix until combined.
- Pour filling over the crust. Place the pan in a roasting pan and add hot water halfway up the sides. Bake for 90 minutes or until center is slightly jiggly.
- Turn off oven, crack door, and let cheesecake cool for 1 hour. Refrigerate for at least 6 hours or overnight.
- Before serving, sprinkle granulated sugar on top and use a kitchen torch to caramelize into a crispy layer. Serve and enjoy!

