
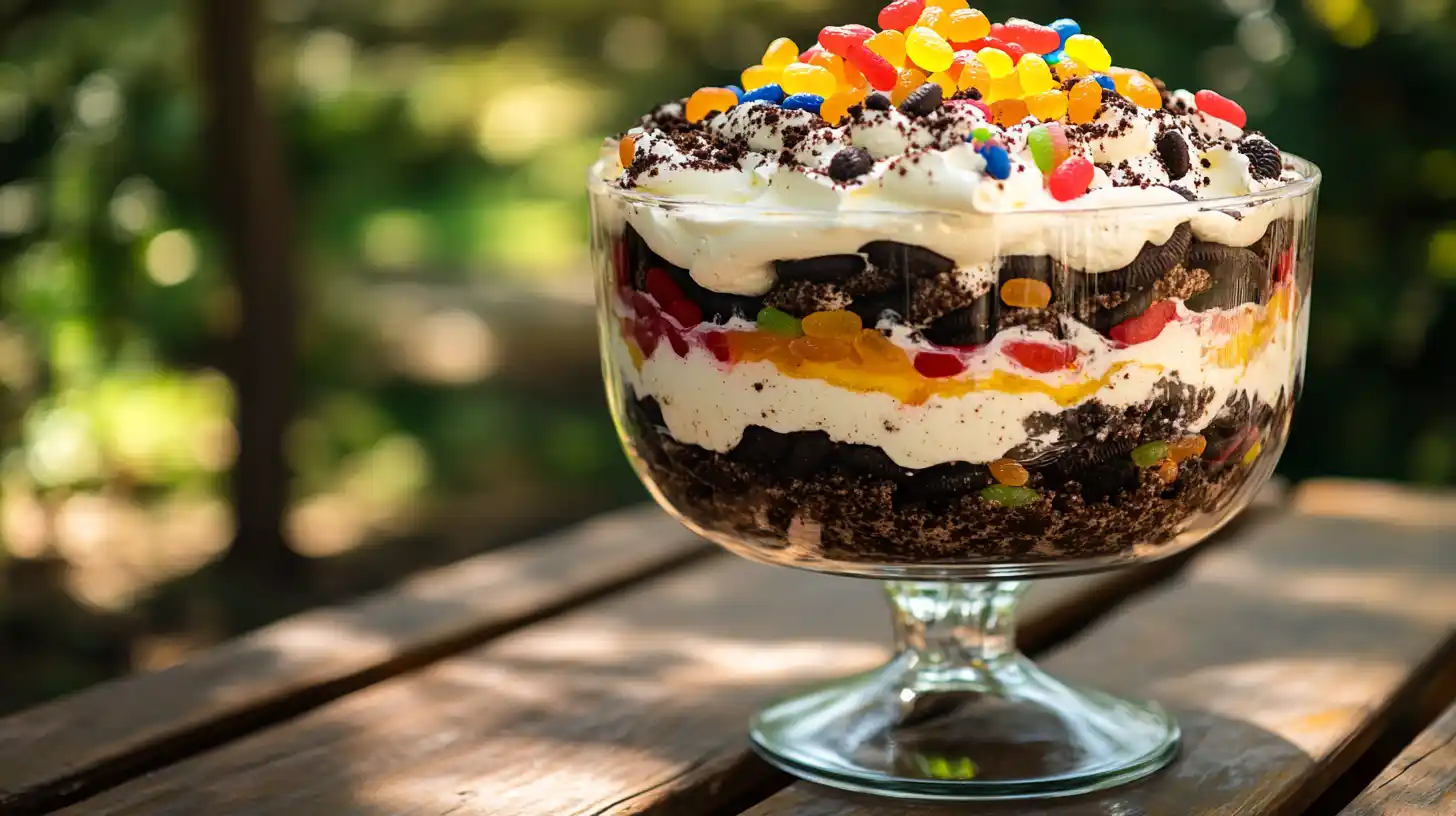
Looking to impress without even touching the oven? This no-bake dirt cake is the ultimate crowd favorite creamy, crunchy, chocolatey, and downright fun. Built with layers of silky pudding, fluffy whipped topping, and crushed Oreos (with gummy worms for that playful throwback), it’s a dessert that vanishes in no time. Perfect for birthdays, parties, or whenever you need a quick, irresistible sweet fix.
Table of contents
- What is a Dirt Cake?
- Why You’ll Love This Dirt Cake Recipe
- Essential Ingredients for the Best Dirt Cake Recipe
- Step-by-Step Dirt Cake Recipe Instructions
- Dirt Cake Variations to Try
- Pro Tips for the Perfect Dirt Cake
- Common Mistakes to Avoid When Making Dirt Cake
- Storage and Make-Ahead Tips
- What to Serve with Dirt Cake Recipe
- Frequently Asked Questions
- Conclusion
What is a Dirt Cake?
If you’ve never heard of dirt cake, you might be raising an eyebrow right now. Dirt? In a cake? Seriously? But don’t worry there’s zero actual dirt involved.
Dirt cake is the kind of nostalgic dessert that takes you straight back to childhood birthdays, school parties, and family cookouts. It’s got all the best things in one bite creamy, sweet, crunchy, and chocolaty, with a playful twist. Imagine a mix between a trifle, a pudding cup, and an Oreo-packed surprise, and you’ve got the magic of dirt cake.
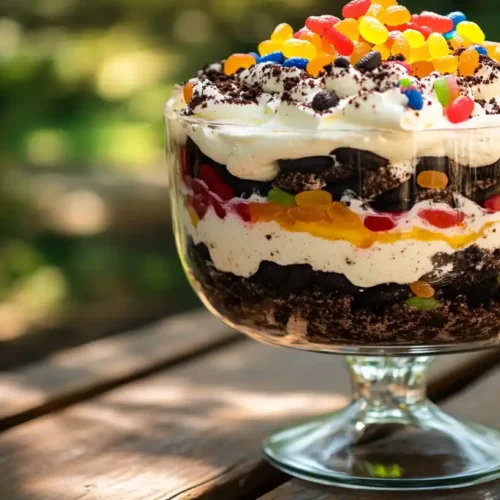
This cake is completely no-bake no oven required and zero risk of burning. It’s built in layers of silky vanilla pudding, whipped cream cheese, and crushed Oreo cookies that mimic, you guessed it, dirt. Add a few gummy worms for a playful touch, and you’ve got a dessert that looks like a flower pot but tastes like pure heaven.
And while it might be fun for kids, adults can’t resist it either. Whether you’re prepping for a potluck or planning a themed party, this dessert is a crowd-pleaser every single time.
Why You’ll Love This Dirt Cake Recipe
You know how some desserts are complicated, take forever to make, and need a degree in culinary arts to pull off? Yeah, this one’s not like that.
This dirt cake recipe is all about keeping it simple, sweet, and stress-free. Here’s why you’ll love it just as much as we do:
No Baking Required
You don’t need an oven or any fancy tools. Just a couple of mixing bowls and some fridge space.
Super Kid-Friendly
Whether you’re making it for kids or with kids, this is a perfect project. (Hint: Let them crush the Oreos it’s messy fun!)
Perfect for Every Occasion
From Halloween to Easter, birthdays to backyard BBQs, dirt cake is flexible. Want it spooky? Add gummy spiders. Festive? Try pastel sprinkles or edible flowers.
Customizable & Allergy-Friendly
With simple swaps, you can make it gluten-free, dairy-free, or even vegan. There’s a version for everyone.
Make-Ahead Magic
It actually tastes better after a few hours in the fridge. So you can prep it ahead and forget about it until it’s time to serve.
So if you’re tired of over-the-top recipes or want something that brings instant joy without the baking battle this one’s for you.
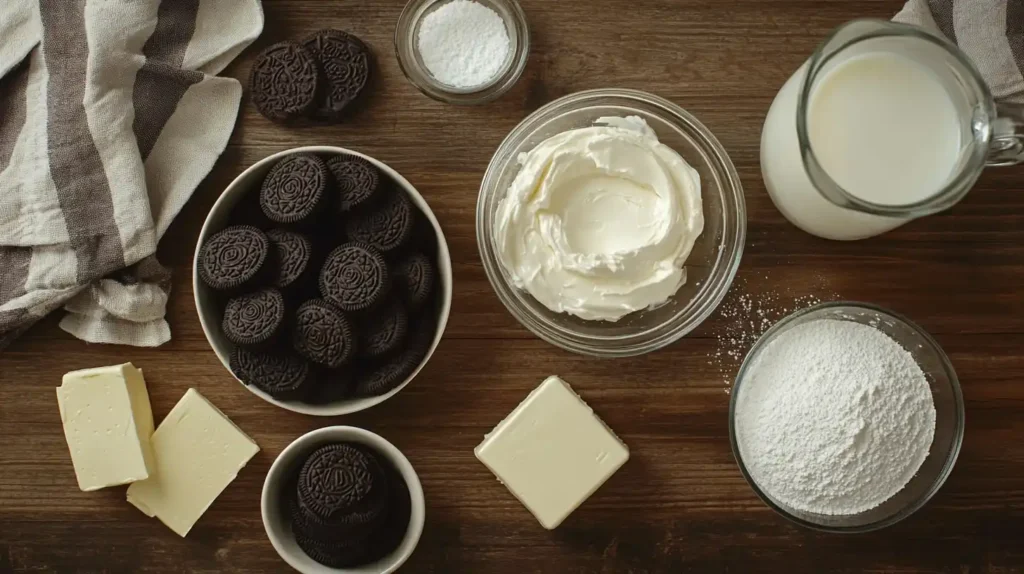
Essential Ingredients for the Best Dirt Cake Recipe
Let’s dig into what makes this cake so crave-worthy (pun intended). Below is a complete ingredient list, including alternatives for special diets.
Ingredients & Quantities
| Ingredient | Quantity | Notes / Substitutions |
|---|---|---|
| Oreo cookies | 15 oz (1 family-size pkg) | Can use gluten-free Oreos or similar cookies |
| Cream cheese | 8 oz | Room temperature is best for mixing |
| Butter | 1/4 cup (4 tbsp) | Softened; unsalted is preferred |
| Powdered sugar | 1 cup | Adds sweetness to the filling |
| Instant vanilla pudding | 2 boxes (3.4 oz each) | Use instant, not cook-and-serve |
| Milk | 3 1/2 cups | Dairy or lactose-free milk (not plant-based unless thick) |
| Cool Whip (whipped topping) | 8 oz | Can sub with dairy-free coconut whip |
| Gummy worms | As needed (optional) | For decoration (kids love them!) |
You’ll also want a trifle bowl, large glass bowl, or individual serving cups to build the layers. And don’t forget the fridge space this dessert likes to chill.
Ingredient Breakdown
Oreo Cookies = The “Dirt”
They’re crushed into crumbs (cream filling and all!) to form the soil-like topping. You can use a food processor or smash them in a zip-top bag with a rolling pin. Super satisfying either way.
Cream Cheese & Butter = Rich Creaminess
This combo gives the filling a cheesecake-style body. It balances the sweetness and makes it feel fancier than just pudding.
Instant Vanilla Pudding = Silky Layer
Make sure it says instant pudding. Cook-and-serve just won’t set properly for this no-bake dessert.
Cool Whip = Light & Fluffy Texture
It makes everything smooth and light. Can’t find Cool Whip? Any store-brand whipped topping works just fine or go for the dairy-free versions if needed.
Powdered Sugar = Sweetness Boost
Helps round out the flavor and mix into the cream cheese better than granulated sugar.
Pro Ingredient Tips:
- Use double-stuffed Oreos for extra creamy layers.
- Let cream cheese and butter sit at room temp for at least 30 minutes before mixing. Cold ingredients don’t mix well!
- For plant-based versions, try almond milk + vegan whipped topping + dairy-free cream cheese.
Step-by-Step Dirt Cake Recipe Instructions
Alright, time to turn that ingredient list into a layered masterpiece. You don’t need a pastry degree to pull this off just a little mixing, layering, and chilling. Let’s break it down into easy steps you can totally handle, even on a busy day.
Step 1: Make the Vanilla Pudding Mixture
Grab a large mixing bowl and your pudding mix!
- Pour 2 boxes of instant vanilla pudding into the bowl.
- Add 3½ cups of cold milk. It’s best if the milk is straight from the fridge it helps the pudding set faster.
- Whisk for about 2 minutes, or until the pudding thickens slightly. You want it soft but not runny.
- Gently fold in the Cool Whip using a spatula until fully combined.
Set this bowl in the fridge while you work on the next layer.
Step 2: Make the Cream Cheese Mixture
This is the creamy dream layer that ties it all together.
- In a separate bowl, beat 8 oz of cream cheese and ¼ cup butter (both softened) until smooth and creamy. Use a hand or stand mixer either works great.
- Add 1 cup of powdered sugar and mix again until it’s velvety.
- Combine the pudding mixture into this bowl and mix on low until fully blended.
Now you have your luscious vanilla-cream filling. Seriously, try not to eat it all with a spoon.
Step 3: Crush the Oreos
Time to make the “dirt.”
- Add the full pack of Oreos (16 oz) to a food processor and pulse until they’re fine crumbs.
– No processor? Toss the cookies in a zip-top bag and crush them with a rolling pin. Messy fun alert! - Set the crumbs aside they’re going to be your topping and middle layers.
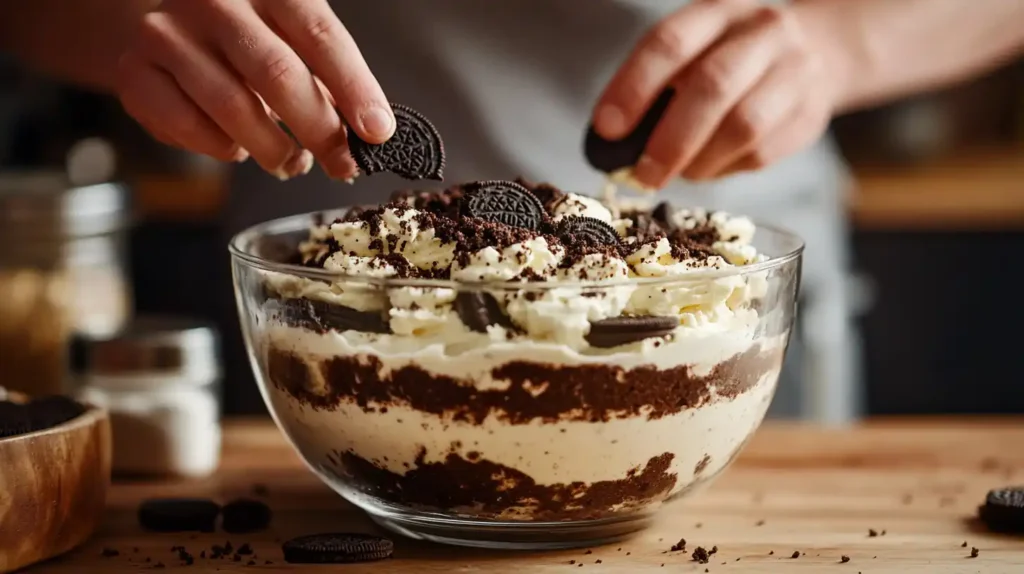
Step 4: Layer Like a Pro
You’ve got two components: the creamy pudding-cheese mixture and the Oreo crumbs.
Now it’s time to assemble:
- Start with a layer of the cream mixture on the bottom of your bowl or cups.
- Add a generous sprinkle of Oreo “dirt.”
- Repeat the layers until you run out of cream, ending with Oreo crumbs on top.
Most people get 3 full layers of cream + 4 of Oreos. Try to keep the top flat for decorating.
Step 5: Decorate!
Here’s where it gets fun!
- Stick in some gummy worms (they look like they’re crawling out of the dirt).
- Add edible flowers or candy bugs for a garden party vibe.
- Use Halloween gummy eyeballs or candy bones for a spooky version.
Let it chill in the fridge for at least 4–5 hours, or overnight for best flavor.
Dirt Cake Variations to Try
Want to level up your dirt cake game? You’re in luck this dessert is super flexible, and you can tweak it for any theme, flavor, or dietary need. Here are some of our favorite twists:
Halloween Dirt Cake
Spook it up with:
- Gummy worms, spiders, and eyeballs
- A few candy gravestones
- Chocolate pudding instead of vanilla for a darker look
Perfect for classroom parties or trick-or-treat nights!
Spring Garden Cake (Easter or Mother’s Day)
This one is soft, pretty, and great for spring:
- Use pastel-colored M&Ms and edible flowers
- Swap Oreos with Golden Oreos for a “sand” cake effect
- Add Peeps marshmallows on top
🇺🇸 4th of July Dirt Cake
Want to be patriotic and delicious?
- Add red, white, and blue sprinkles or candies
- Use strawberry or blueberry pudding
- Decorate with little flags or star gummies
Peanut Butter Chocolate Dirt Cake
For the chocolate lovers who can’t resist a PB twist:
- Mix 1/4 cup of peanut butter into the cream cheese mixture
- Add Reese’s Pieces or chopped peanut butter cups on top
- Use chocolate pudding instead of vanilla for a rich flavor
“Imagine peanut butter cups and Oreo cookies had a love child that’s this version.”
Dairy-Free or Vegan Dirt Cake
Yes, you can make it 100% plant-based!
- Use dairy-free cream cheese (like Violife)
- Replace Cool Whip with coconut whip (like SoDelicious Cocowhip)
- Substitute almond or soy milk (note: instant pudding may not set perfectly try vegan pudding mix)
- Oreos are already accidentally vegan, so you’re good there!
Just be mindful of brands, especially for allergies.
Gluten-Free Dirt Cake
Swap regular Oreos for gluten-free Oreos or any gluten-free sandwich cookies. All other ingredients are easy to keep GF.
Pro Tips for the Perfect Dirt Cake
Want your dirt cake to wow every single time? These tips are here to turn your good dessert into a legendary one. Trust me, following these little tricks will make a huge difference in taste, texture, and presentation.
Chill for at Least 6 Hours (Overnight Is Better)
Seriously don’t rush this part. Letting the cake chill in the fridge for several hours allows the layers to set properly. The cookie crumbs soften slightly and the flavors meld together like magic.
If you’re serving it for a party, make it the night before and save yourself the stress.
Crush Cookies into Fine Crumbs
You want the Oreos to be super crushed, almost like soil. If they’re too chunky, the layers won’t sit evenly and your “dirt” won’t look realistic.
Pro tip: Use a food processor for super-fine crumbs. If you’re smashing them in a bag, give them a few extra whacks with your rolling pin.
Soften Cream Cheese and Butter Ahead of Time
Cold cream cheese = lumpy mess. Room temperature cream cheese = silky smooth dream. Let both the butter and cream cheese sit out for at least 30 minutes before mixing.
Can’t wait that long? Zap them in the microwave for 5-8 seconds at a time (but not too long, or you’ll melt them).
Make It in Individual Cups for Easy Serving
Hosting a party or cookout? Instead of one big bowl, try layering the dirt cake into 9 oz clear plastic cups. It’s cute, mess-free, and makes serving a breeze. No digging, no scooping just grab and go!
Layer for the Wow Factor
Want it to look just as good as it tastes? Use a glass trifle bowl or dessert glasses so your beautiful layers can shine through. Keep the edges clean as you go for that Instagram-worthy finish.
Dress It Up With Themed Toppings
Decorations make this dessert pop! A few of our favs:
- Gummy worms
- Edible flowers
- Crushed candy bars
- Sprinkles for any holiday
- Chocolate rocks or candy pebbles (looks like real dirt!)
Let your imagination go wild.
Common Mistakes to Avoid When Making Dirt Cake
Even though dirt cake is super easy, a few simple mistakes can totally mess it up. Here’s what to look out for so you don’t end up with a sad, soupy, or lumpy dessert.
Using Cook-and-Serve Pudding
We’ve all been there you’re shopping in a rush and grab the wrong box. But listen closely:
Cook-and-serve pudding requires heat to thicken, and it won’t set properly in this cold dessert. If you use it, your layers will turn to mush.
Double-check the box it should say “Instant.”
Skipping the Chill Time
I get it. You want to eat it right now. But dirt cake that hasn’t been properly chilled will taste like sweet soup with soggy crumbs.
You need to let the layers firm up and the cookie crumbs soften just enough. At least 4–6 hours, but overnight is ideal.
Cold Cream Cheese = Lumps
Cold cream cheese is hard to mix smoothly. If you skip softening it, you’ll end up with little white lumps in your filling that refuse to go away.
Let it sit at room temperature until it’s nice and soft or microwave for just a few seconds.
Overmixing the Whipped Topping
Whipping it too hard can knock all the air out of the Cool Whip, making your filling dense and heavy instead of light and fluffy.
Treat it like a cloud it’s delicate!
Uneven Layers
If your layers are too thin or uneven, the final dessert might look messy and unbalanced. Use a measuring cup or spoon to keep your layers consistent, especially if you’re working with cups or a trifle bowl.
Forgetting the Final Touch
Don’t skip the decoration. A plain top is… well, boring. Even a simple sprinkle of crushed Oreos or a single gummy worm will take it from “meh” to OMG, that’s adorable!
By keeping these mistakes in mind and applying the pro tips from earlier, you’ll be well on your way to dirt cake perfection.
“It’s not just about following the recipe it’s about having fun with it. The more love you put into it, the better it tastes.”
Storage and Make-Ahead Tips
Dirt cake isn’t just tasty it’s also a meal prep hero. Seriously, not many desserts can be made the night before and actually taste better the next day.
Here’s how to keep your dirt cake fresh, creamy, and totally devourable.
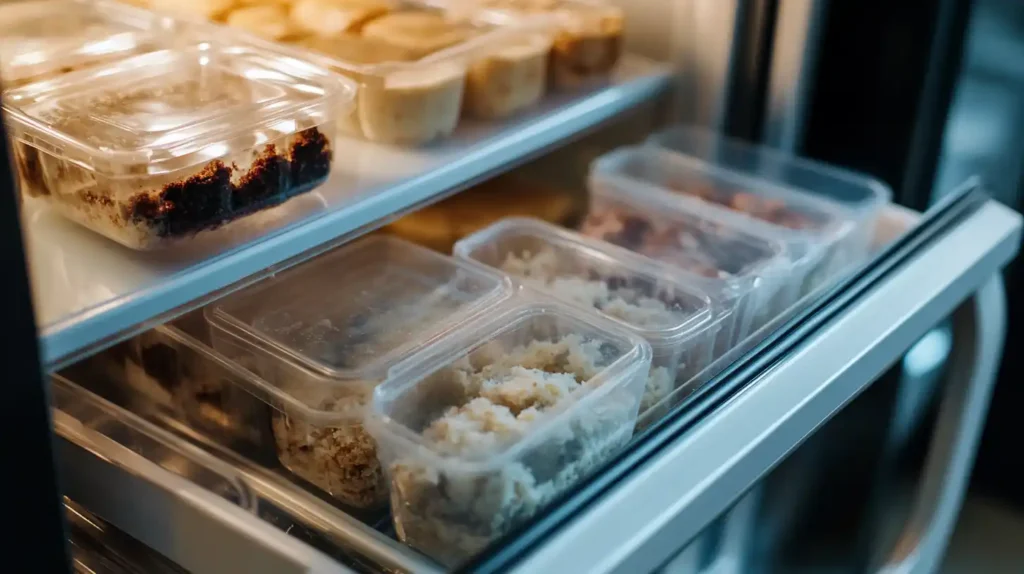
How to Store Dirt Cake Properly
Once your dirt cake is layered and decorated, it’s time to pop it in the fridge.
Here’s how:
- Cover it tightly with plastic wrap or foil if you’ve made it in a large bowl.
- If you made individual cups, just snap the lids on or cover the whole tray with plastic.
- Keep it on a flat shelf in the fridge so the layers don’t get smushed.
It’ll stay good for up to 5 days, but let’s be real it probably won’t last that long.
Can You Freeze Dirt Cake?
Technically? Yes. Should you? Meh… not really.
Freezing changes the texture of the pudding and whipped topping, making them grainy or watery when thawed.
But if you’re desperate to save leftovers:
- Freeze in individual portions in airtight containers.
- Thaw in the fridge overnight before serving.
- Expect a slight texture change.
Bottom line: Fresh is best! If you know you’ll have leftovers, try making smaller batches or individual servings.
Make-Ahead Tips for a Stress-Free Dessert
Want to prep ahead for a party or busy holiday?
You can make dirt cake up to 24 hours in advance, and it’ll taste even better than if it was made same-day.
Tips:
- Assemble it fully the night before.
- Add any decorations (like gummy worms or flowers) right before serving to keep them from getting soggy.
- Keep it chilled until serving time.
What to Serve with Dirt Cake Recipe
- Mini Banana Muffins: Sweet, soft, and bite-sized to complement dirt cake’s creamy texture.
- Orange Fish Cookies Recipe: Whimsical, citrusy cookies that are a fun flavor play with chocolate.
- Sweet Chex Mix Recipe: Crunchy and snackable with a sweet-and-salty vibe.
- Cortisol Cocktail Recipe: A wellness-inspired drink to keep the party balanced.
Frequently Asked Questions
Can You Make Dirt Cake the Night Before?
Absolutely! In fact, it’s highly recommended. Making dirt cake ahead gives the layers time to set, the cookies time to soften slightly, and the flavor time to deepen.
Just store it in the fridge, covered tightly, and add your toppings right before serving.
Is Dirt Cake a Cold or Warm Dessert?
Dirt cake is a cold dessert, served straight from the fridge. No baking, no heating—just cool, creamy, crunchy goodness.
It’s perfect for hot summer days, potlucks, or literally any time when you don’t want to turn on the oven.
Can You Freeze Dirt Cake for Later?
Short answer: You can, but it’s not ideal.
The whipped topping and pudding may separate or turn watery when thawed, especially after a few days in the freezer. If you do freeze it, store it in small portions and thaw slowly in the fridge.
But honestly? Try to eat it fresh within 3–5 days for the best flavor and texture.
What Is a Good Substitute for Oreos in Dirt Cake?
Great question! If you’re out of Oreos or want to switch things up, try:
- Chocolate graham crackers (for a less sweet, more cocoa-forward taste)
- Chocolate Teddy Grahams (fun for kids)
- Gluten-free sandwich cookies (for GF needs)
- Golden Oreos (for a sand cake version!)
- Homemade chocolate cookies (if you’re feeling fancy)
“No Oreos? No problem. The real magic is in the layers.”
Conclusion
Dirt cake is one of those desserts that proves you don’t need fancy ingredients or complicated steps to make something truly special. It’s easy, affordable, and always a hit whether you’re feeding a crowd, surprising your kids, or just treating yourself.
From the crunchy crushed cookies to the creamy layers of pudding and whipped topping, every spoonful is packed with fun and flavor. And the best part? It’s totally customizable, make-ahead friendly, and perfect for any occasion.
So the next time you’re in the mood for a dessert that’s playful, nostalgic, and downright delicious, whip up a dirt cake and watch the smiles appear. It’s simple, sweet, and guaranteed to be remembered.
No-Bake Dirt Cake
Equipment
- Mixing bowls
- Hand Mixer
- Spatula
- Trifle Dish or 9×13-inch Pan
Ingredients
Cream Cheese Mixture
- 8 oz cream cheese softened
- 1/4 cup butter softened
- 1 cup powdered sugar
Pudding Mixture
- 2 packages instant vanilla pudding mix 3.4 oz each
- 3 1/2 cups milk
- 8 oz Cool Whip thawed
Assembly
- 15 oz Oreo cookies crushed
- gummy worms for decoration
Instructions
- In a mixing bowl, beat the softened cream cheese and butter until smooth. Add powdered sugar and mix until well combined.
- In a separate bowl, whisk together the instant vanilla pudding mix and milk until thickened. Fold in the thawed Cool Whip until smooth.
- Gently fold the cream cheese mixture into the pudding mixture until fully incorporated.
- In a trifle dish or 9×13-inch pan, layer half of the crushed Oreo cookies, followed by half of the pudding mixture. Repeat the layers with the remaining Oreos and pudding mixture.
- Top with additional crushed Oreos and decorate with gummy worms as desired.
- Cover and refrigerate for at least 4 hours or overnight to allow the dessert to set.